Textured wall panels offer an easy and affordable way to give interiors a stunning facelift. These decorative panels bring dimension, personality, and sophistication to walls without requiring extensive renovations or professional installation. Ideal for revamping a cozy bedroom nook or elevating the style of a living room, textured wall panels provide a DIY-friendly option that combines aesthetic appeal with practical benefits.
This comprehensive guide covers everything needed to install textured wall panels successfully. From selecting the right materials and prepping walls to cutting panels and securing them flawlessly, each step is designed to help transform spaces confidently and easily.
Why Choose Textured Wall Panels?
Before diving into the DIY process, it helps to understand why textured wall panels are becoming increasingly popular in both modern and traditional interiors:
Versatile Design Options
Textured wall panels aren’t just a one-size-fits-all solution—they’re available in an impressive variety of materials and finishes to suit any interior. Whether you lean toward the natural warmth of wood, the sleek look of PVC, or the minimalist charm of gypsum, there’s a panel to match your vibe. MDF options are popular for painting and customizing, while leather-textured panels can add a bold, luxe touch to office or lounge spaces. From geometric 3D designs to subtle wave patterns, these panels can either blend into your space or become the statement piece that ties the room together.
Easy Installation
Forget about days of wall prep and expensive labor—many textured panels are designed with the DIYer in mind. Thanks to peel-and-stick adhesives, snap-together systems, or lightweight materials that are easy to cut and handle, installation often takes just a few hours. Some systems are even renter-friendly, allowing for non-permanent updates that can be removed without damaging walls. Whether you’re sprucing up a single feature wall or giving an entire room a makeover, the hassle-free setup is a huge draw for weekend warriors and seasoned home improvers alike.
Instant Impact
If you’re craving a dramatic change without knocking down walls or repainting for hours, textured wall panels are your shortcut to a showstopping transformation. The three-dimensional surface instantly catches the eye, giving flat walls a sense of movement, character, and sophistication. It’s one of the easiest ways to elevate a space, whether you’re going for cozy, modern, rustic, or ultra-contemporary. Think of it as a bold accessory for your walls: one that creates instant depth and visual intrigue.
Insulation and Acoustics
While they’re often praised for their looks, textured wall panels pull double duty when it comes to functionality. Many materials—especially those with thickness or foam backing—offer additional thermal insulation, helping to regulate room temperature more efficiently. If you live in a noisy environment or share walls with neighbors, these panels can help dampen sound, reduce echo, and improve acoustics. That means they’re not just beautiful—they’re smart, too.
Types of Textured Wall Panels
To ensure the best results, you’ll want to pick a panel type that suits your space, purpose, and budget:
MDF Panels
Medium-density fiberboard (MDF) panels are one of the most popular options for interior textured walls, and for good reason. They’re durable and smooth and take beautifully painted paint, making them a top choice for creating custom looks in living rooms, bedrooms, and hallways. Whether for sleek modern lines or ornate patterns, MDF can be routed or molded to match almost any design. They’re also relatively affordable and easy to work with, which makes them a go-to for DIY feature walls that look high-end without the high cost.
PVC Panels
If you’re tackling high-moisture areas like bathrooms, laundry rooms, or kitchens, PVC (polyvinyl chloride) panels are your best bet. These lightweight panels are waterproof, mold-resistant, and incredibly low maintenance—just wipe them down when needed. They come in a variety of colors and textures, including faux marble, tile, and stone, giving you the flexibility to achieve a polished look without the hassle of grout or sealing. Plus, their snap-together installation makes them an easy win for utility spaces that still deserve style.
Gypsum Panels
Want to add serious architectural drama? Gypsum panels are the masters of dimension. Made from the same material as drywall but molded into raised or recessed patterns, these panels bring intricate 3D texture to your walls. They’re often used in accent walls, lobbies, or entryways where you want to make a bold statement. Although they’re heavier and may require a bit more care during installation, they’re typically painted or covered in wallpaper for a seamless, customized finish that looks ultra-refined.
Wood Panels
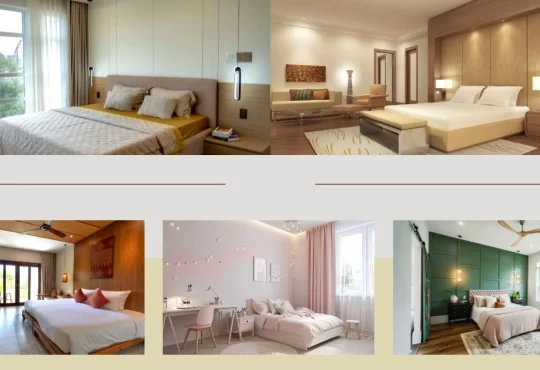
Nothing beats the timeless charm of wood. Whether you opt for reclaimed barn wood, stained planks, or engineered wood with a veneer finish, wood-textured panels instantly warm up a space. They’re a natural fit for rustic, cabin-style interiors, but they also work beautifully in modern settings when used in sleek slats or minimalist patterns. Wood panels bring texture, grain, and depth that create a sense of coziness and character, perfect for dens, bedrooms, or reading nooks.
Fabric or Leather Panels
For interiors that lean into luxury, fabric or leather panels offer a soft, tactile elegance that other materials can’t match. Often padded for extra comfort and sound absorption, these panels are popular in upscale bedrooms, home theaters, and office spaces where acoustics and aesthetics go hand in hand. Leather adds a refined, masculine touch, while fabric panels can range from velvet to linen, depending on the look you’re going for. They also help create a quieter, more intimate atmosphere.
Tools and Materials You’ll Need
Before starting your DIY textured panel project, gather these essential tools and materials:
- Tape measure
- Level
- Pencil or chalk
- Stud finder (for heavier panels)
- Adhesive (construction adhesive or panel adhesive)
- Caulking gun
- Utility knife or saw (depending on panel type)
- Sandpaper
- Cleaning cloth
- Nails or screws (if applicable)
- Safety gear: gloves, goggles, dust mask
Optional:
- Primer and paint
- Paintbrushes or rollers
- Edge trim or molding
Step-by-Step DIY Guide to Installing Textured Wall Panels
Step 1: Choose the Wall and Plan Your Layout
First, identify which wall you’d like to enhance. Consider the room’s dimensions, lighting conditions, and intended function to ensure the most effective design choices. Accent walls work well in living rooms, bedrooms, and even entryways. Once you’ve picked a wall, measure its height and width to calculate the number of panels you’ll need.
Create a simple sketch of the wall and plan the arrangement. Decide whether you’ll use a full-panel layout or mix and match different textures. If your design involves multiple patterns or cuts, measure accordingly.
Step 2: Prep the Wall Surface
A smooth, clean wall ensures better adhesion and a seamless finish:
- Remove any existing wallpaper, nails, or debris.
- Wipe the surface using a damp cloth, then let it dry completely before proceeding.
- Sand down any uneven areas or peeling paint.
- If needed, apply primer and allow it to dry completely before proceeding.
Step 3: Identify Wall Studs and Draw Guideline Layouts
Use a stud finder to mark wall studs, especially if you’re installing heavier panels that may need additional support. Next, use a level and pencil to mark vertical and horizontal layout lines based on your design. These layout lines serve as essential visual anchors, ensuring panels are installed with precise alignment and balanced symmetry.
Step 4: Cut Panels to Size
Use a utility knife for thin PVC or gypsum panels and a power saw or jigsaw for thicker MDF or wood panels. Always wear safety gear while cutting. Remember to leave space for trims, corners, and electrical outlets.
Dry-fit the panels by laying them against the wall before attaching them. This helps confirm that everything fits properly and looks as intended.
Step 5: Apply Adhesive and Install Panels
Use a high-quality construction adhesive or panel-specific glue. Spread adhesive in a zigzag pattern across the back of the panel, maintaining a narrow border around the edges to allow for natural expansion.
Press the panel softly onto the wall, ensuring it matches the drawn guidelines perfectly. Hold it steady for several seconds to allow the adhesive to bond securely. For heavier panels, use finishing nails or screws along with adhesive.
Repeat this process for each panel, ensuring the seams are tight and the design flows seamlessly.
Step 6: Finishing Touches
Once all panels are in place:
- Use caulk or filler to seal any visible gaps or seams for a smooth, polished finish.
- Sand the filled areas lightly once dry.
- Touch up with paint if needed.
- Install trim or molding around the edges to give your panel wall a polished finish.
Tips for a Professional Look
- Work in Sections: Divide your wall into sections and work from bottom to top for better alignment.
- Check Alignment Frequently: Use your level often to ensure panels are straight.
- Mind the Pattern: If your panels have a directional or repeating pattern, double-check orientation before applying adhesive.
- Don’t Rush: Take your time with measurements, cuts, and placements.
Creative Design Ideas with Textured Panels
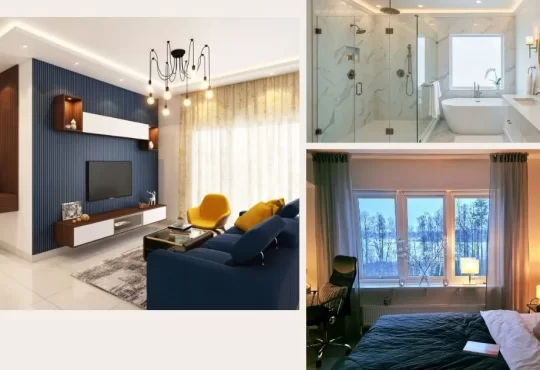
- Accent Wall: Use 3D panels to create a bold statement wall behind your bed or sofa.
- Wainscoting Alternative: Add half-height panels in hallways or dining rooms for a classic look.
- Ceiling Panels: Textured panels aren’t just for walls—they can also add depth to ceilings.
- Room Dividers: Create free-standing panel partitions for stylish room separation.
- Furniture Facades: Apply smaller panels to cabinet doors or headboards for a custom effect.
Maintenance and Care
While textured wall panels typically require minimal upkeep, some regular care helps preserve their appearance and longevity.
- Dusting Routine: Gently remove surface dirt using a soft cloth or microfiber duster to maintain a clean, fresh look.
- Avoid Harsh Cleaners: For painted or wood panels, use a mild detergent and water.
- Inspect for Damage: Check for lifting corners or cracks periodically and repair immediately.
Common Mistakes to Avoid
- Skipping Wall Prep: Poor adhesion and uneven surfaces can ruin the effect.
- Wrong Adhesive Choice: Make sure your adhesive matches the panel type.
- Improper Panel Storage: Keep panels flat in a dry area before use to avoid warping.
- Forgetting Expansion Gaps: Allow room for material expansion, especially with wood panels.
Estimated Project Cost
The total cost of a DIY textured wall panel project can vary depending on the material and area covered. Here’s a rough breakdown:
- MDF Panels: $30 to $50 per panel
- PVC Panels: $10 to $25 per panel
- Gypsum Panels: $20 to $40 per panel
- Adhesive: $5 to $10 per tube
- Other Supplies: $20 to $50 total (caulk, nails, primer, etc.)
A typical 10×10 ft feature wall might cost anywhere from $150 to $600, depending on the materials and design.
Transform Your Walls with Texture
Textured wall panels are a brilliant way to bring style, texture, and personality into any room of your home. Installing these panels with the right tools, a clear plan, and a bit of patience can be a highly rewarding weekend project. Whether you’re a seasoned DIYer or a beginner, this guide should give you the confidence to tackle your wall transformation like a pro.
Ready to revamp your space? Gather the tools, spark some creativity, and transform walls into bold statements of style and personality.


